Sunday, August 29, 2010

Homemade & Fresh Peach Crisp

Can I just start by saying this is SOOOOO simple... honestly- it takes no time at all to whip up this scrumptious dessert! I look forward to making some all winter long now that I have fresh frozen peaches waiting for me in my freezer! For those of you not familiar with cobblers, it's kinda like a pile of fruit with some yummy crunchy stuff on top- no crust underneath.

Ingredients:
6-7 juicy, fresh peaches (pitted, peeled, and sliced)
2 cups oats
3 TBSP whole wheat flour
1/2 cup brown sugar
1/2 cup melted butter
1 tsp cinnamon
1/2 tsp nutmeg
1/4 cup pecans or walnuts, finely chopped

Step 1: Fresh peaches- peeled, pitted, and sliced right into the dish!
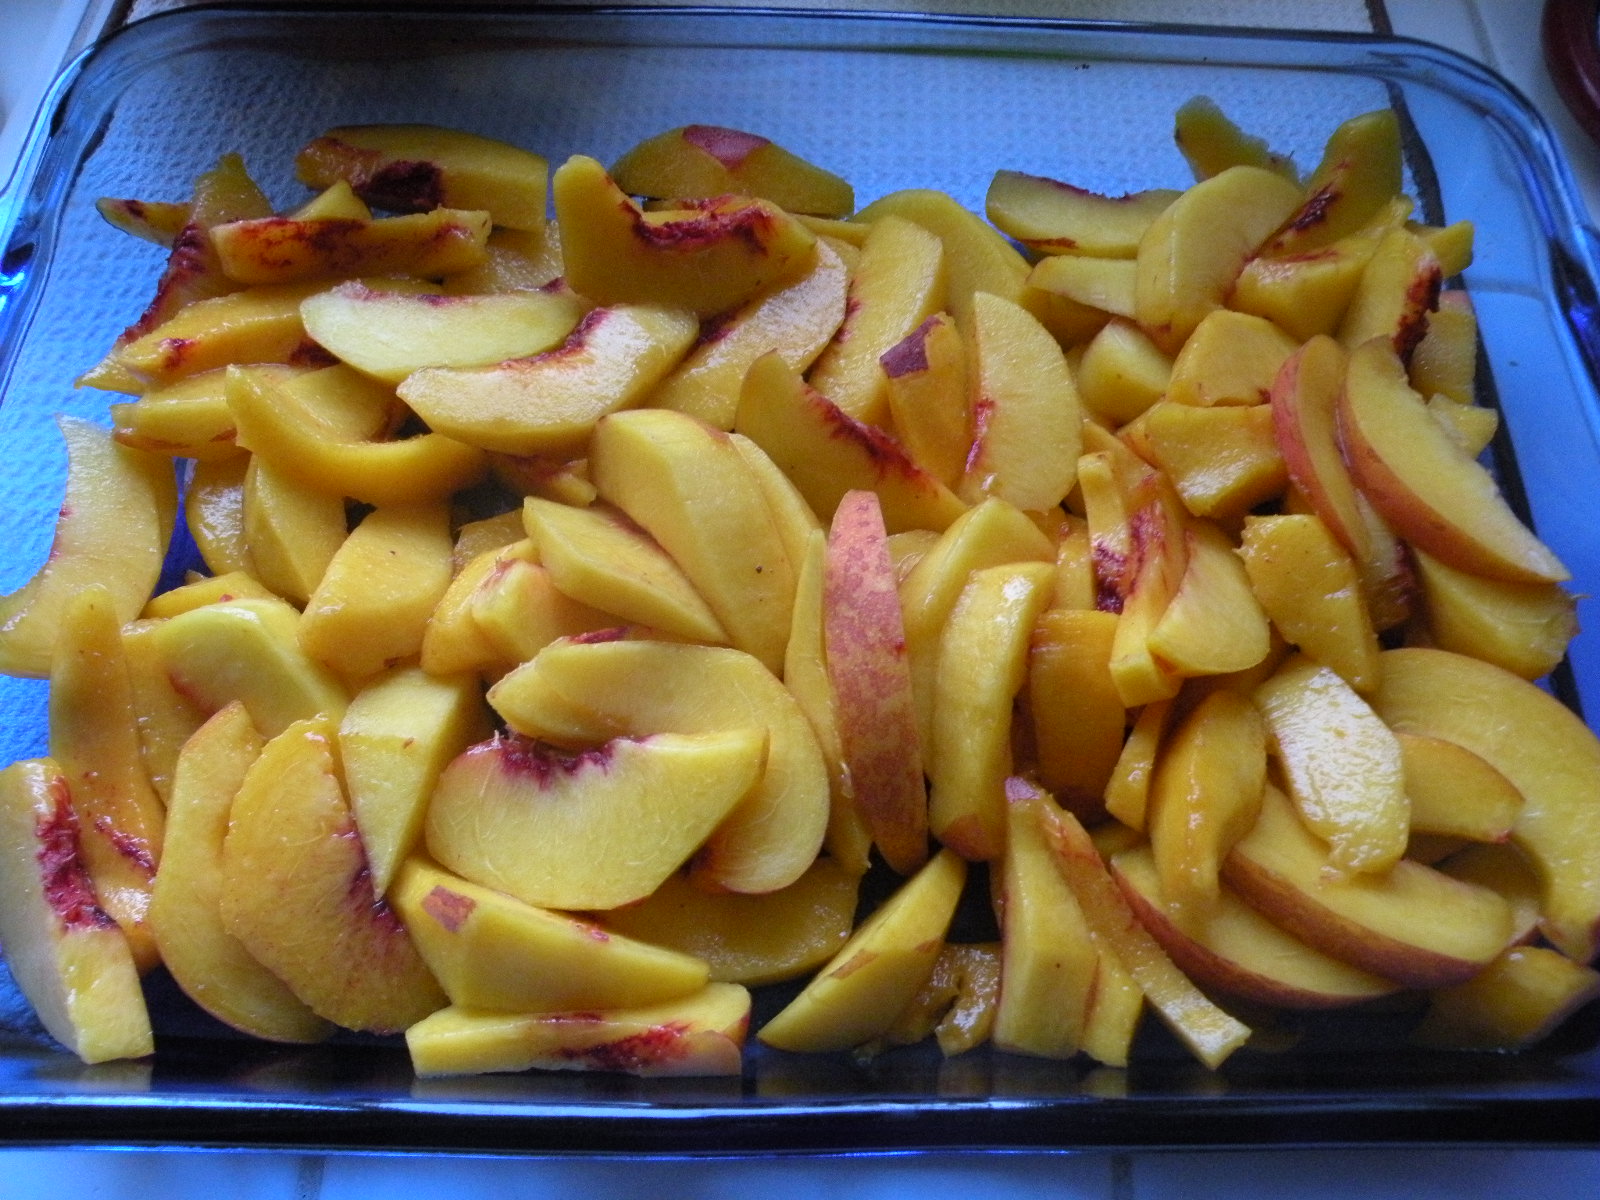
Step 2: Mix up the topping. That's it.
Directions:
Simple. Wash, peel, pit and slice your peaches right into your 9 x 13 pyrex dish. Then mix up the remaining ingredients in a bowl, pouring your melted butter in last and mixing it until it's a crumbly topping. Scoop your crumbly topping out of the bowl and onto the top of the peaches, pop it in the oven on 375 for 30 minutes and cook until it's got a nice golden crisp color on top. It is best served warm with vanilla ice cream- but I am not gonna lie- it's delicious the next day chilled as a leftover delight!

Please excuse my old rickety pyrex dish, my cute one was in use!

Saturday, August 28, 2010

End of Summer Fruit...

So my goal for the end of this summer was to pick up some local, fresh, ripe boxes of stone fruits to freeze for the coming months, as well as dehydrate them and make some fruit roll ups.... AND I DID IT! Here's some tips I learned along the way...
The thicker you layer your fruit roll ups (for use in your dehydrator) the chewier they are. They take longer to dehydrate, but they turn out really well. If you can make 3 rows/rolls at a time it makes a ton, plenty to store up for the fall and winter months.
I tried to dehydrate some peach slices, they turned out a little drier than I would have liked. Next time I think I will cut them in quarters or even halves like they sell them at Trader Joe's so that they are chewier.
This was probably the best part of my adventures.... I sliced TONS of peaches and froze them on a cookie sheet or cake pan and put them in the freezer for about 2 hours. I actually used a cake pan so that I could layer the peaches, and in between each layer I put a piece of wax paper. Once they were frozen enough, I put them in a plastic freezer bag and continued to add each batch to it. The benefit to freezing them first BEFORE putting them straight into the bag, is they don't freeze into one big clump- they freeze in individual slices.
I look forward to using these frozen peaches in smoothies, peach cobblers and de-thawed treats for the middle of winter! Stay tuned for my peach cobbler recipe, it was so simple and SOOOOO good!

Friday, August 27, 2010

End of the Summer Tomatoes..

So I had a bunch of tomatoes to use up at the end of this summer before I pulled out my tomato plants and I was in a quandary with what to do with them. So, I looked up on line how to make your own, homemade tomato sauce from scratch and it was surprisingly easy. Here's what I came up with in case you find yourself with tomatoes you don't want to waste.

First, cut a slit down one side of your tomato....
...and then put them in a pot of boiling water for just a minute or two in order to remove the skins.
After they have been in a boiling bath for 1-2 minutes, strain them and rinse them under cold water for another minute. Then peel the skin off of them, it comes right off really easily and put them right into your food processor.
Once they are blended you are going to add them to a stock pot that has some celery, onion, garlic, and a drizzle of Grape Seed Oil (the amount you use with all of the ingredients depends on how many tomatoes you are working with).
Let them simmer on low for about 2 hours. You can add this as your base to any soups (like Minestrone Soup or the like), spaghetti sauce, or any other red sauce. I added red wine and seasonings (like Oregano & thyme, s & p) to mine and used it as a light spaghetti sauce with some ground meat and noodles- so simple and fresh!
The tomatoes cook way down, so the more you use the better. If you find your sauce getting to thick add a bit of water (or wine!) to get it to the consistency you like.You can freeze this or use it right on the spot- you won't be disappointed!

Thursday, August 26, 2010

Onion Chicken in Balsamic Sauce

This is not a new recipe, in fact- it is an old faithful one that I had previously posted, but with poor pictures- it didn't do it justice. If you have't tried this yet- you are missing out BIG time- get on it, add it to this weeks meal plan- it's SOOOO good!
Ingredients:
1 TBSP olive oil
1 sweet onion, chopped
4 chicken breasts
2 cloves garlic, minced
1 1/2 cup chicken broth
1/2 cup balsamic vinegar
1/2 cup sun dried tomatoes
S & P to taste

Directions:
Preheat the oven to 350. In a large skillet over the stove, heat your oil and add your chopped onion and garlic and saute over med.-high heat for a few minutes until the onions are tender. Put washed chicken breasts in skillet and brown for a few minutes on each side. (NOTE: I cut my chicken breasts into about 6 big chunks, so that they soak up more of the goodness.) After it is browned on the stove, place the chicken & onions in a 9x13 baking dish. Heat the balsamic and chicken broth in the same skillet until it boils, let is simmer for a few, it will thicken some. Pour this mixture in your baking dish over your chicken, cut up your sun dried tomatoes and put them in (if they are whole, I cut then in half or thirds with kitchen scissors), then cover it with foil and pop it in the oven for 20- 30 minutes.
Serve with: it is almost a MUST to serve this dish with some sort of pasta/rice because it has so much wonderful juice, it really is great over a bed of pasta. I use the whole wheat or brown rice pasta from Trader Joe's and I make a green to go along side. ** This dish has been known to be a big hit with company- great to make for guests!

Monday, August 9, 2010

Dehydrators: 201

Homemade Fruit Roll-ups
These are super easy to make, you just need ripe fruit and a blender.... and your dehydrator of course! They are so great if you have left over fruit that you're not going to get to in time or some that is too soft for eating, but perfect for fruit-rolling! Simply spray your fruit roll-up tray (that comes with your dehydrator) with a non-stick spray and blend your fruit until it's completely pureed. Pour the pureed mixture on the fruit roll-up trays and smooth it out until it's even all over the tray. Put in the dehydrator- see manual for time amount (mine was about 6-7 hours depending on how thick you layer your tray).Here are some sample fruit concoctions:
  • 4 strawberries
  • 1 peach
  • handful of black berries
  • 1 plum
  • 1 cup unsweetened organic applesauce
Another one:
  • 2 cups strawberries
  • 2 cups applesauce
Another one:
  • 1 apple, cored not peeled
  • 1/4 cup water
  • 1 peach
  • 1 nectarine
  • 3 strawberries
** After it's done drying, they peel up really easily from the tray and I just tear mine into pieces and keep them in an air tight container... but they don't last long!

Sunday, August 8, 2010

Dehydrators:101

So, I had some crazy idea that I would start dehydrating fruit and herbs and whatever else I could think of, so I saved up my $$ and I bought one online for about $60. It's been fun to learn how to use it and try to get creative, but I haven't branched out too much, just stayed basic- here's what I've done so far:

Dried Apples.... A HUGE hit with my toddler!
I buy a big box of apples from Costco (when in season) or pick up a sack of them at a fruit stand or farmers market. Peel them, core them, and slice them. Place them on your tray and cook per dehydrators instructions. They are fabulous and the pectin in them really aid in digestion! If you or your little ones struggle with constipation, this is a great thing to keep on hand (as is FRESH apple & spinach juice made in a Juicer- I've made & recommended that many a times for family or friends after they have surgery, or are on antibiotics or have just had a baby- it's a great way to get things "going again!" Want more tips on the topic- email me I have lots of them up my sleeve!).
I also tried Kiwi & bananas- which were also a big hit! Sometimes I get a ton of one fruit (in this instance, kiwis) in my Abundant Harvest Organic Box for the week and we don't get to them all before they over-ripen, so we turn them into fruit snacks!
I also tried blueberries and grapes, but in my opinion they weren't worth the time or cost to make them, it's easier to buy your own raisins, you need to have TONS of grapes to even make a dent in this project! I have also done strawberries and they are awesome!! Highly recommend those, as well as herbs like Bay Leaves, Marjoram, Basil, and Parsley (when I have left over herbs that I am not going to use, I pop them in the dehydrator so they don't go to waste!)
So what I am learning is what thickness we like, how long to dehydrate them, and which ones we like soft and others we prefer crunchy. It's my goal to do a few big batches at the end of a season to save some yummy fruit for us when they are no longer in season... we'll see if I get it done with all of the stone fruits at the end of this summer season! If you ever want to try this and have fruit to use, please feel to borrow mine if you want to take it for a "taste spin" before purchasing your own!

Next Update: How to make Homemade Fruit Roll-ups

Thursday, August 5, 2010

End of the Week Pasta


My sister came up with this little recipe a long time ago- it's simple and easy, yet so tasty and light. We call it the "End-of-the-Week Pasta" because we usually make it at the end of the week with whatever leftover veggies we haven't used up. There is no "must have" veggies that must be included, I just use any thing that's going to go to waste... here are some ideas that I used in my dish, feel free to vary it up! For those of you who like specifics, this recipe might drive you a little batty- bare with me!

Ingredients:
1 bell pepper (I had 1/2 orange and 1/2 red)
3 squash (I had 3 small yellow ones)
1/4 red onion (again, it's what was left over)
a large handful of green beans, chopped
a handful of mushrooms, sliced
MUST HAVES:
2 TBSP butter
3 cloves garlic
sundried tomatoes (I used about 1/4 of an 8 oz jar), sliced
1 TBSP grapeseed oil
1 lb. chicken, browned and diced
approximately 1/2 cup of shredded parmesan cheese (again, it's.... what I had left!)
1/2 cup white wine (I used sherry because it was already open!)
s & p

Directions:
Boil water for your pasta (I use brown rice cork screw pasta from Trader Joe's). Then, in a large skillet, add your 3 cloves garlic, 2 TBSP butter and chopped onion and let it saute until it starts turning brown. Add all of your chopped veggies & your 1/2 cup white wine and let them saute for a 4-5 minutes, sprinkling them with a little s & p. Remove them from the heat and add them to you serving bowl, sprinkling your parmesan over top so they melt together. Then in your same large skillet, add your TBSP of oil and your washed chicken (I used whole tenders, if you use breasts, chop it up before hand for quicker cooking). Season your chicken with some s & p and let them brown on one side before flipping them over. Once you flip them over, add another splash of white wine (mine was a BIG splash!) and let them finish cooking. Remove them from the pan and let them cool for a quick minute before cutting them into bite size pieces. Add your sundried tomatoes to your serving bowl, then your diced chicken, maybe a little more parmesan and toss well. Serve as the entree... you will enjoy it's light and crispy flavor from all the veggies and the zest from the wine!

Wednesday, August 4, 2010

Banana (or Blueberry) Crumb Muffins....

So if you haven't noticed yet from my previous posts, I LOVE to bake! Maybe because it seems more fun to share baked goods, everyone enjoys a little plate of homemade, warm baked goodies and I love to deliver them :) Here's one that never left my house, but instead was eaten and enjoyed by many who have passed through in the past 2 days... they are DE-LICIOUS and I would recommend them for any occasion or ordinary day! You can make them with bananas or blueberries...
My little chef in training... mashing bananas all by herself!
Ingredients
1.5 cup flour ( experiment with different flour types and measurements)
1.5 tsp baking powder
1 tsp baking soda
1/2 tsp salt
3/4 cup sugar or raw coconut crystals
3 ripe bananas, mashed
1 egg, lightly beaten
1/3 cup coconut oil
Crumb Topping

Crumb Topping
2 TBSP whole wheat flour
1 TBSP butter, soften or melted
1/4 cup sugar or raw coconut crystals
1/4 tsp cinnamon
Directions
Preheat your oven to 375. Mix your dry ingredients in a large bowl and sift well. Add to it your beaten egg, mashed bananas, a coconut oil (in liquid form), mix thoroughly and scoop into lined cupcake tins. Mix all your ingredients in a small bowl until it becomes crumbly in texture. You have two options for the topping,#1: spoon it on before they go in the oven and it will melt into the muffin OR #2 you can bake them for 10 minutes, pull them out and spoon it on top, immediately placing them back in the oven for another 10 minutes- this option will leave it more crumbly and loose like the ones in the pictures. You choose! ** Baking time is 18-20 minutes.**

Blueberry Variation:
Instead of using bananas, substitute the 3 mashed bananas for 1 cup fresh or frozen blueberries and 3/4 cup unsweetened apple sauce. They are equally delicious!** Just a note, when I made the blueberry ones, I put the crumbs on BEFORE they went in the oven, you can see the difference in the two pictures of how the toppings turn out.***

Tuesday, August 3, 2010

Black Bean and Corn Salad

Here's a great recipe for summertime.... It is quick, easy, and simple.... my favorite kind! I made it with "Chili Lime Chicken Kabobs" and it made for a great complimentary side dish!

Ingredients:
4 cups cooked black beans
1 red bell pepper, diced
1/4 cup red onion, diced
1 & 1/2 cups corn, fresh or frozen
1/3 cup fresh cilantro, chopped
** a handful of cherry tomatoes??? If you are a tomato lover, this would probably be a great accent to the salad... I am not a lover, so I didn't include them in the mix!

Dressing:
2 TBSP olive oil
1 lime, juiced
1 tsp cumin
s & p to taste

Directions:
Combine all the ingredients in a large bowl, pour dressing over top and season with s & p to your liking. If it seems like it needs a little sweetening for your liking, add a pinch of sugar. Set aside or refrigerate to allow flavors to blend. This salad can be served at room temp or refrigerated and will last up to 5 days stored in an air tight container.

Chili Lime Chicken Kabobs

Sometimes I feel like I get stuck in a "flavor rut", so I am trying to branch out to things I wouldn't automatically gravitate towards... here's my newest find, it was really tasty and out of the box for me. Let me know if you give it a thumbs up or down....
Ingredients:
1 lb. chicken breasts
3 TBSP olive oil
1.5 TBSP red wine vinegar
1 lime, juiced
1 tsp chili powder
1/2 tsp paprika
1/2 tsp garlic powder
1/2 tsp onion powder
1/4 tsp sea salt
1/8 tsp pepper
shake of cayenne pepper (if you like it spicy!)
Skewers

Directions:
Wash and cut your chicken into cubes. Put them in a large ziplock bag (or shallow dish). Whisk ingredients for marinate together in a bowl and pour over the chicken. Let marinate in the fridge for 2-3 hours. Skewer them on a kabob sticks and BBQ over med- high heat for 10- 15 minutes. I served this with Black Bean and Corn Salad and the flavors blended perfectly together!

Sunday, August 1, 2010

Fruit Kabobs

This is another one of those things that I have enjoyed for so long and have simply forgot to add to my blog, so without further a-do... the ever cute Fruit Kabobs.

This is great year round, using whatever fruit is in season at the time. My good buddy Sarah Jane makes them every year for the 4th of July, and I use them a lot with big groups, showers and parties. They are easy to put together and easy for people to to enjoy without having fruit roll all over their plate!

Simply buy wooden skewers at the grocery store and pick up any fruit that is seasonally ripe. For summertime, any of the melons, pineapple, strawberries, and even blueberries work well. In the colder months, think about oranges, apples, grapes and bananas. Softer fruits like peaches and raspberries have a tendency to fall off the skewers. Also, keep your chunks bigger-the thinner you slice them, the more likely they are to fall off the skewer. And if you are preparing these for a large group, it's easy to cut up all the fruit the night before and store it in separate Ziplock bags until an hour or so before when you can assemble them on the skewers.

Fun Dip Ideas to serve with your Fruit:

Lemon Yogurt Drizzle:
1 lemon, zested & juiced
8 oz vanilla yogurt
2 TBSP lemon curd

Mix the lemon curd with the yogurt, zest the lemon (about 2 tsp) and add it some lemon juice for extra flavoring, to your tasting. Stir well and refrigerate until using. This is a runnier dip for drizzling over the top of your fruit.
* This is great to use if you are serving this for a breakfast or brunch, it's refreshing and tangy, and more of a drizzle than a dip!

Strawberry Cool Whip Dip:
1 carton or cool whip, defrosted
1 container of strawberry yogurt, pre-stirred
* Mix the two together and chill before serving. This is more of a sweet treat and looks really cute!

Friday, July 30, 2010

Rosemary Garlic Chicken


Ingredients:
4 boneless, skinnless chicken breasts
4 cloves garlic, minced
1.5 TBSP fresh Rosemary, minced (or 1 tsp dried)
1 TBSP dijon mustard
1 TBSP fresh lemon juice
3/4 tsp salt
1/4 tsp pepper
2 TBSP olive oil

Directions:
Rinse your chicken, pat it dry, and put it in a glass baking dish. In a small bowl, mix the ingredients together and pour over the chicken and coat it well. (You can also do the same thing in a large ziplock bag and let it marinate in there). Cover it and marinate it at room temperature for 30 minutes. BBQ the chicken over low heat for 7-8 minutes per side basting with the marinate while it's cooking. *** You can also make these with skewers (like in the picture), if you do, cut your chicken into chunks before your marinate and adjust the cooking time according to the size of your pieces.

Wednesday, July 28, 2010

Black Bean, Rice, and Cheese Enchiladas...

These were super yummy, bursting with flavor and a really filling meatless option for your menu! There are lots of ways to tweak the recipe, so add or take away depending on your taste buds!
Ingredients:
1/2 onion, chopped
1 green bell pepper, chopped
3 cloves garlic, minced
1 TBSP Grape Seed Oil
2 tsp. chili powder
1 tsp. cumin
1 16 oz. jar of chunky salsa (I used Trader Joe's Chunky Salsa with the black label)
1 can black beans, drained and rinsed
1/4 cup water
1 cup cheese
2 cups brown rice, precooked
3 TBSP cilantro
8 flour tortillas


Directions:
Preheat your oven to 350. Get your brown rice cooking. Saute your onion, garlic, and green pepper in your Grape Seed Oil for a few minutes. Next add your black beans, cumin, chili powder, water and 1 cup of salsa to the pan and let that heat until it simmers, stirring it occasionally (depending on the salsa that you choose, you may need to add more or less water to get the consistency right, just eyeball it) . Next add your cooked rice and let that cook for another minute or two to blend the flavors (I also added a sprinkle of grated cheese to the mix so that the inside of the enchiladas would be cheesy too!). Spray your 9 x 13 pyrex dish. Scoop your rice and bean mixture into your tortillas, roll them up, and place them in your baking dish. Spoon another cup of salsa on the top of the enchiladas, then cover the top with foil and bake for 20 minutes. Uncover them, add your cheese and cilantro and bake for 2 -3 more minutes until the cheese has melted. Serve as is or with sour cream and guacamole! Enjoy!!!

TIPS: Depending on the salsa that you use, judge how many onions you want to saute. My salsa had chunks of onions in it, so I went with less chopped onions. Also, I used green onions to top the dish because I didn't have cilantro, and next time I will skip the green onions and hold out for the cilantro because I think it would add a better flavor.... but fix it to your families likings! Oh and one more thing, rice freezes really well, so next time your making a serving of it, make an extra cup or two and stick it in the freezer for recipes like this one to cut down on the prep time!

Monday, July 26, 2010

Spinach, Sundried Tomatoes, & Artichoke Pasta Salad


This is a delicious recipe that I was introduced to through my sister-in-law Lisa, who got the recipe from her sister Emili, who is my Guest Chef today! She is a ball of fun, not only did she send me the recipe, but she also included a snap shot of her in her chef gear! Thanks Emili for being so fun and sharing this yummy recipe with all of us! You can make it as a side salad or a main meal- you can leave it meatless or add chicken... you choose!


Ingredients:
2.5 cups of Orzo pasta
1 big handful of baby spinach, chopped
1 12 oz. jar of marinated artichoke hearts
1/2 cup feta cheese, crumbled
1 8 oz. jar sundried tomatoes (I buy the Julienne Sliced ones from Trader Joe's)
1 jar or to your liking, of Kalamata Olives, pitted
1 clove garlic, minced
*** 1 lb. chicken, optional
***Extra olive oil or Balsamic Vinegar might be needed as well if you desire more dressing on your pasta.

Directions:
Super easy. Cook your orzo pasta per directions on the package. While that is cooking, if you are adding chicken, brown your meat on the stove with some s & p & garlic powder OR Lawry's Seasoning Salt & pepper. (I grilled my chicken on the BBQ and because I used tenderloins instead of breasts, it only took a few minutes and it added a great grilled flavor!) The rest is easy peasy. Drain your pasta and dump it in a bowl, mince your garlic, drain your sundried tomatoes and add them- give it a stir. Then, chop your spinach and your artichoke hearts and add all of the marinate from the artichoke hearts jar (that serves as your dressing for the salad). Add your feta and toss! If your pasta seams dry (or is dry the next day because it's absorbed all the dressing) add a little extra olive oil and Balsamic vinegar- perfect!

If you have a recipe that you would like to share, feel free to email me and we'll post YOU as our guest chef!

Saturday, July 3, 2010

Homemade Salsa...

Here's a super quick and crowd pleasing recipe for homemade salsa that we've used in our family for a long time. We have tomatoes coming out of our ears over here, so we've been making lots of tomato filled recipes this summer. The easiest way to make this salsa is to dump it all in your Food Processor and let IT do the work! (In the photo I gave it a whirl in my Vitamix, which sad to say- didn't turn out too well, it was a little frothy and unevenly chopped, but you never know until you try! Stick to your Cuisinart!)

Ingredients:
2 lbs. tomatoes
3 cloves garlic
3 green onions
1/2 bunch cilantro
1 TBSP Red Wine Vinegar
2 tsp sugar
2 tsp lime juice, fresh
1/4 tsp onion powder (I didn't have so I omitted)
1/4 tsp salt
1/4 tsp pepper

FOR THE KICK, depending on how heated you like things choose ONE of the following options:
  • 2 roasted jalapeno peppers OR
  • raw jalapeno peppers, seeds removed OR
  • 1/2 a can of green ortega chilies OR
  • nothing extra, still delicious!
Directions:
Put all of the ingredients in your food processor (I chopped my tomatoes in half, as well as my green onions and I minced my garlic first) then just pulsate it until it's the consistency that you like! Enjoy with some tortilla chips!

Thursday, July 1, 2010

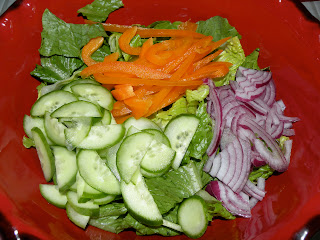
Greek Salad Stuffed Pitas...

I don't know about you guys, but we can't get enough salads over here during these summer months! Here's another great option to add to your repertoire! Super simple, light, fresh, and fast!
Salad Ingredients:
Head of Romaine
1 lb. chicken tenders
1/4 thinly sliced red onion
1/2 thinly sliced bell pepper
1/2 thinly sliced cucumber
1/4 cup crumbled feta cheese
**olives, optional

Dressing Ingredients:
6 TBSP red wine vinegar
5 TBSP Olive Oil
1/2 tsp dried oregano
1/2 tsp dried basil
1/4 tsp garlic powder
1/4 tsp salt
1/4 tsp pepper
1/4 tsp Dijon mustard

Additional Ingredients:
Pita Breads sliced in half
2 TBSP fresh lemon juice for your chicken


Directions:
Prep your chicken and brown it in a skillet with 1 TBSP Grape Seed Oil. I also added 2 TBSP of freshly squeezed lemon juice while it cooked to give it more flavor, then I seasoned the tenders with s & p and let them cook until both sides were browned. Chop the chicken when it's done cooking to top your salad. To prep your salad, simple- wash and slice your veggies, add your chicken, feta, and dressing right before serving and toss well. Fill your pitas with your salad mix and enjoy!