Wednesday, September 21, 2011

Banana Whipped Treat...


It's been a while since I have posted... kinda in a slump of good recipes, kinda busy traveling, kinda not making time to get on the computer- a little combination of it all! BUT... have no fear, we have a great new recipe to try!

Hats off to my sister for this one... she sent me the idea, I tried it a few hours later.... and well... we are having them again tonight! Super simple, really tasty, light and a healthy way to end your day!

Ingredients:
2 frozen bananas (frozen for at least an hour)
1 cup coconut milk or almond milk
5-6 ice cubes
small handful of walnuts & chocolate chips for topping

Directions:
Simply peel your bananas and freeze them- you can peel them and pop them in a freezer ziplock for at least an hour or two before hand. Put the frozen bananas in your Vitamix or blender with your almond milk and ice cubes and blend until whipped! Finely chop your walnuts and chocolate chips and sprinkle (heavily!) on top!!!

Add ons?? Try a scoop of peanut butter if you're a fan .... or a tablespoon of Flaxseed if you are looking for more fiber in your diet with a hint of nutty flavor! Want it more creamy like ice cream?? Lessen your amount of almond milk! Like coconut?? Use coconut milk in place of almond milk... really the options are endless!

Frozen Banana Prep: If you want to freeze multiple bananas at a time, peel them, lay them on a cookie sheet and then freeze them for an hour or so, then take them out, pop them off your cookie sheet, and then store them in a ziplock freezer bag. This will prevent them from freezing all together.

Wednesday, August 17, 2011

Asian Flare Salad...


This is just an idea for you.... a lot of parts to this salad are "choose your own adventure" if you know what I mean- pick what you like and as much of it that you prefer... no measuring on this one! Let your taste buds be your guide!


Ingredients:
Lettuce or Cabbage
Carrots, shredded
Broccoli or cucumber, chopped
Bean Sprouts
Snap Peas
Bell Pepper, sliced
Fresh Mint, chopped
Grilled or Browned Chicken Tenderloins
Toasted Almond Slivers or Slices
A few Shakes of Sesame Seeds

Dressing:
1 TBSP Soy Sauce
1 TBSP Rice Vinegar
2 TBSP Grape Seed Oil
1 tsp Sesame Seed Oil
2 tsp creamy peanut butter
1/4 tsp grated ginger


Chicken:
I actually made my chicken in the crock pot for this salad. I added a splash of soy sauce, a splash of chicken broth, and a pinch of grated ginger. I cooked it on low for 3 hours. That's it. Then I chopped it up and threw it on top, super simple, super tasty!

Tuesday, August 16, 2011

Peanut Asian Salad Dressing...

NOTE: I have updated the last two posts with pictures, sorry I posted them without pictures initially, someone has been doing a hack job on my blog and stealing my recipes, pictures and posts... lame huh??? Anyhow, without further a-do... here's the latest:

The other night I was in the mood to mix things up a bit from my ordinary salad dressings and think outside the box :) So... I came up with this tasty dressing for on top of an "Asian Style" salad. I have made it 3 times since, changing it a bit each time, but I have finally landed on the "official one". I will post the salad recipe tomorrow, but for now I will tempt you with the dressing...

Ingredients:
1 TBSP Soy Sauce
1 TBSP Rice Vinegar
2 TBSP Grape Seed Oil
1 tsp Sesame Seed Oil
2 tsp creamy peanut butter
1/4 tsp grated ginger

Directions:
Combine, shake and serve over Asian Flare Salad or as a dipping sauce for grilled chicken tenderloins.

Tuesday, August 2, 2011

Sauteed Green Beans...


Super simple, so fresh, so crisp, compliments anything perfectly. You can't go wrong.

Ingredients:
1 lb. fresh green beans, ends trimmed
2 cloves garlic, minced
a drizzle of expeller pressed coconut oil
sea salt
pepper
Directions:
After rinsing your green beans, discarding small or shriveled ones, trimming the ends and cutting them into bite sizes, toss them in boiling water to blanch them for 2-3 minutes. Then throw them right into a skillet over medium heat with a drizzle of expeller pressed coconut oil and freshly minced garlic cloves. Toss every few minutes for 5-6 minutes, depending on how crunchy you like them. Season with sea salt & pepper and serve! Enjoy!!

Saturday, July 30, 2011

Sweet Rosemary & Lemon Salmon

Ok, here's a keeper.... if you like fish and you like flavor and you are feeling up for something new and fun- here's your ticket! We tried this recipe out the other night and it was great, a fun treat if you wanna break away from your regular simple fish!

We did this recipe on the BBQ and we used a Cedar Plank to give it a smoked flavor. It turned out very tasty... here's what you do! (If you don't have a plank or don't want to use one, follow these cooking directions, it should turn out just fine!)

Ingredients:
2 TBSP honey
1 TBSP lemon zest, finely grated
1 tsp fresh rosemary, finely minced
2 tsp dijon mustard
1 lb. salmon stakes

Directions:
If you use a cedar plank, you need to soak it for at least an hour, 2 if you have the time, and you can to do that by fill a roasting pan and submerging the plank under water (with a glass or some other heavy object) letting it soak for a while so it doesn't torch while on the grill :)

Then place your salmon stakes on the plank with the skin side down, and mix your marinate in a small bowl. Spoon your marinate on top and let it sit for 15 minutes, not too long for fish, you can over marinate it. After 15 minutes, take the plank to the BBQ and over med-high heat, grill it for about 20 minutes or until the fish looks cooked and the fat starts to surface to the top (it will depend on how thick your steaks are). Remove the plank from the grill and let the fish rest for 5 minutes on the plank before serving. Remove skin before putting it on the plate... but you already knew that :)

Wednesday, July 27, 2011

Fresh Apple Spinach Juice


When I left for college, my mom gave me her old "Juice Man" juicer from Costco when she replaced hers with a more upscale one. I was happy to accept the gift :) I still have it, and from time to time I think about upgrading mine as well, but with 2 little kids in tow, I don't have as much time as I would like to juice, so my ol' faithful Juice Man still does the trick when I bust him out every blue moon!

Now, when making fresh juice (or smoothies for that matter), you should consume all of it within 8 hours to gain total health benefits. So, if you make a larger batch than what you can consume, freeze it in canning jars and take one out the night before you drink it. Fresh juice is best consumed in the morning when you wake, to be the first thing to go through your system and give you energy throughout the day. If you have a juice man or access to one, try this recipe out!


This has been one of my staple juices since college. I have always recommended this juice combo to people who tell me they (or their children) can't "go" and seem to be a little clogged up. (more on that topic below!) Whether that's you or not, this sweet treat & nutrient dense juice is a delicious option for a fruit & veggie combo that is sure to leave you feeling energetic and revitalized!

Ingredients:
2-3 Granny Smith Apples
1 bunch spinach

Directions:
Wash and slice your apples, rinse your spinach, and send it all through a juicer! Enjoy a nice fresh, frothy glass of homemade juice!

More Info on being "clogged up"...
For some reason, that is probably the most popular question or topic I have heard over the years, and for some reason people love to ask ME about it! I really think a steady diet of fruits and veggies with limited process food will make most systems pretty regular, but if not, here are some things you can try to combat the clog-ation :)
  • REAL Apple Juice: This is the easiest thing to do, I usually recommend this to people when they tell me their kid hasn't gone in a few days... now, when I say REAL apple juice, I don't mean Motts or some other see-thru brand, that's NOT real apple juice, it's made from concentrates and is very high in sugar, not to mention it doesn't contain any pectin and pectin is what gets things a' moving. If you get a fresh squeeze apple juice, one that's dark and almost cloudy or NOT see-thru, or better yet the apple spinach combo above, that will unclog things fairly quickly and effectively. Look for REAL Fresh Squeezed Apple Juice in the refrigerated isle, if it's not refrigerated, it's not real! (Check out Trader Joe's, theirs is delicious!)
  • Flax seed: This is a great thing to take daily if you are trying to regulate your insides. This will get you so regular, you will go like clockwork, first thing upon waking, it's that great. The fiber and roughage that flax seed packs is super for your pipes! Simply get flax seeds and grind them in a coffee grinder (or buy the pre-ground ones, but they don't have the same shelf life or "umpf" that the whole seeds have, but none the less, they still work) and mix them in an inch or two of Pineapple Juice. Pineapple juice has a certain enzyme that aides in digestion and works wonders when combined with the Flax. If you need a little more "umpf" add a TBSP of Aloe Vera Juice, and you'll really be moving! You can also add flax seeds to baby food (small amounts will do the trick) or to smoothies, see here for details.
  • Probiotics: These things are ESSENTIAL! If you are going to take any supplement, take PROBIOTICS!! The "PRO" meaning "good" and the "BIOTIC" meaning bacteria which means that you are introducing your digestive tract to ample "good bacteria" every time you take this suppliment. Not only that, but if your digestive tract can continue to stay in the "positive zone" with bacteria, you will be less likely to get sick or ill. Did you know that most diseases begin in the gut?? Good enough reason alone to be getting all the good bacteria you can into your gut to fight off the bad bacteria, right??? See Dr. Furhman's site for a great Probiotic, or check out Nature's Way for a super probiotic for babies and kids. Is your infant gassy or constipated?? Dip their pacifier in probiotic and help their tummy's regain a positive balance, it's completely safe for all ages.
  • And at the risk of sounding repetitive, if you or your kids don't empty your bowels at least once a day or if you have to strain (too graphic??? well, let's face the facts!) you need to increase your fruits, veggies, legumes, beans, nuts, and water intake and reduce your sugar & refined foods.... that's a quick fix as well!
**Hope that helps, and I am sure.... I won't be getting any comments on this post! HA!

Monday, July 25, 2011

BBQ'd Turkey Burgers....

Hello again! We've had some fun summer adventures and visitors lately, and I haven't had time to post, but I have got lots of fun, new recipes to share so stay tuned!!!

Now, I not trying to take any credit on this one, I didn't invent turkey burgers of course, this is one of those posts that's supposed to help you out when you got strolling thru recipes to try to desperately find something to make tonight... or at least that's how it works for me. If I log it as a meal, then when I am planning, it jogs my ol' brain and gets put on the list and is usually under a day that says "something quick and easy!" Hope it works in the same manner for you, because this one should definitely be on the summer meal schedule! Fast, easy, effortless and enjoyed by all!

Ingredients:
Turkey patties, either premade or formed by you with 1 lb. ground turkey
s & p & garlic (or garlic powder)
buns of your choice
avocado (a MUST in my book)
red leave lettuce
thinly sliced red onion
tomato
ketchup & mustard or BBQ sauce

Directions:
If you are making your own patties, you can season your pound of meat with s & p & fresh minced garlic, then knead it all together by hand in a large bowl or you can season them afterwards (which doesn't require you to get your hands dirty!). Then split your pound of ground turkey into 4-5 sections and roll each section into a ball, push them down to make patties. Vo-la. If you haven't yet seasoned them, do that with s & p & garlic powder, and BBQ for a few minutes on each side, these cook quickly and are great for last minute meals! Add your condiments and enjoy!

***Avoiding carbs or wheat?? Try wrapping your burger in red leaf lettuce!***

Friday, July 15, 2011

Green Bean & Sweet Corn Salad

Here's another light, fresh, and summer-happy salad to enjoy. You could easily grill up some chicken and serve this along side as your meal for the evening. Maybe add some kidney beans and have a great vegetarian salad for lunch or dinner! Enjoy this salad while the vegetables are plentiful and in season!

Ingredients:
3 ears of sweet corn, cooked & cut off the cob
1.5 lbs of fresh green beans, washed & trimmed
1 heirloom tomato, diced
1/2 bell pepper, diced
1/4 cup red onion, finely diced
10-12 leaves fresh basil, chopped
3 cloves garlic, minced
s & p
olive oil
red wine OR balsamic vinegar


Directions:
Bring a large pot water to boil and shuck your corn. Boil your 3 ears of corn for about 5-7 minutes until cooked, remove them from the pot but keep your water boiling. After trimming your green beans end's off, cut them into bit size 1 inch pieces, and put them in the boiling pot for 5 -7 minutes. Cook until tender, and drain. Set the flat side of your corn on the cob on a cutting board and cut off the kernels. Add the green beans, corn kernels, diced tomato (I used half of an heirloom), bell pepper, red onion and 3 cloves garlic to your bowl and toss. Add a drizzle of olive oil (about 3 TBSP) and s & p and your choice of vinegar. For a lighter flavor use red wine, a stronger more flavorful burst- use balsamic. Serve warm or chilled, delicious either way!

With Balsamic Vinegar added

Tuesday, July 5, 2011

Caprese Salad with Heirloom Tomatoes...

My mom loves to make Caprese Salad during the summer months when tomatoes are growing profusely and basil is sweet & fragrant. It's such a perfect, seasonal dish to be enjoyed when the ingredients are at their finest. Now, my mom and my sister in law Lisa could sit side by side and pass the plate back and forth until it the entire dish was gone, commenting the whole time how DELICIOUS it is, they would go on and on and ON. They love it. LOVE IT.

Here's my confession. I on the other hand would not devour the whole dish, I would politely take a small serving... because.... tomatoes aren't really my favorite things..... that is until now. I discovered the Heirloom tomatoes, and boy oh boy, did they make me change my tune! My sweet farming neighbors brought me a bag of them a few days ago, along with a DIVINE plate of Caprese Salad and I almost had to excuse myself so I could lick the plate- it was that GOOD!

So... get on out there, find yourself some Heirloom Tomatoes, pick up the few essential ingredients and make a platter for you and... well, just YOU!

Ingredients:
Heirloom Tomatoes, sliced
Mozzarella cheese, sliced
basil leaves, chopped
s & p
olive oil
balsamic vinegar
Directions:
Wash and slice your tomatoes, I would count about 1 tomato per person. As you slice your tomatoes, lay then on a platter alternating a slice of mozzarella cheese in between each tomato until your platter is full. Then drizzle a bit of olive oil & balsamic on top, sprinkle a little s & p then top with a generous amount of chopped basil before serving. This is a quick and easy dish to prep and should be made right before serving.

Saturday, July 2, 2011

Cool Cucumber & Mint Salad


Hello new favorite salad... this is QUICK... and when I say quick, I am talking... 5 minutes tops! It's so simple and SO STINKIN' good! What a great combination of flavors and so refreshing and cool for a hot summer day! I didn't measure anything because you use what you have and you make it according to your taste bud's preferences, but here's what you mix together...

Ingredients:
Persian or Armenian Cucumbers, halved and sliced
some red onion, thinly sliced
a handful of mint leaves, finely chopped
a sprinkling of feta cheese
a splash of red wine vinegar
a drizzle of olive oil
s & p

Directions:
Wash, slice and chop your cucumber, thinly slice your onion, add your s & p and your oil & vinegar. Then cover & refrigerate until serving. Right before you serve it, toss it and add your feta and mint, toss once more and eat the whole bowl.... it's SOOOOOOOOO good!

PICTURED: I used Armenian cucumbers, they are light in color, therefore in the photo they are not peeled, I left the skin on them, and they are delicious- not bitter at all! If you can't find those, my second choice would be the Persians, and if not those then the Hothouse cucumbers.

Friday, June 24, 2011

Zucchini Frittata


I can remember my mom making this dish (or a variation of it, because I changed a few things!) as a kid. She would make it for parties or family gathering and cut it up into small cubes for an appetizer. I am sure my siblings and I ate more than an "appetizer portion" it was yummy and always a treat. Now I make it for something to keep on hand for lunch or to serve with a salad for a light, summery dinner dish. I hope you enjoy it too!

Ingredients:
3 cups zucchini, grated
1 cup parmesan cheese, grated
5 eggs, lightly beaten
1 sweet onion, chopped
1/2 cup expeller pressed coconut oil
1 cup flour
1.5 tsp baking powder
1/2 tsp salt
1/4 tsp pepper
1/2 cup bread crumbs *** (see note below regarding seasoning)
6 mushrooms, chopped OR
1/4 cup orange bell pepper, chopped
***NOTE ON BREAD CRUMBS: you can purchase already seasoned bread crumbs and use those, or if you prefer, purchase or make plain bread crumbs and add 1/8 tsp. garlic powder, 1/8 tsp. dried oregano, and 1/8 tsp. dried basil for extra flavoring to your crumbs).

*** Note on Mushrooms VS. Bell Peppers: You can make this recipe either way, the bell peppers leave a sweeter taste to it, the mushrooms a more veggie taste, either way is good. The original recipe called for mushrooms, but I subsitituted when I didn't have any on hand. Don't use more than 6 mushrooms because they release moisture and will leave your dish too runny. Sometimes I make it without either!
Before
After
Directions:
Preheat your oven to 350 and grease a 9 x 13 glass dish. Mix all wet ingredients together first, then add the dry and mix until well blended. Pour into your glass dish and bake for 40 minutes until the top is lightly golden. Cool and cut into cubes for an appetizer or squares for a dish. This can be served hot or cold and makes great left overs!

Wednesday, June 22, 2011

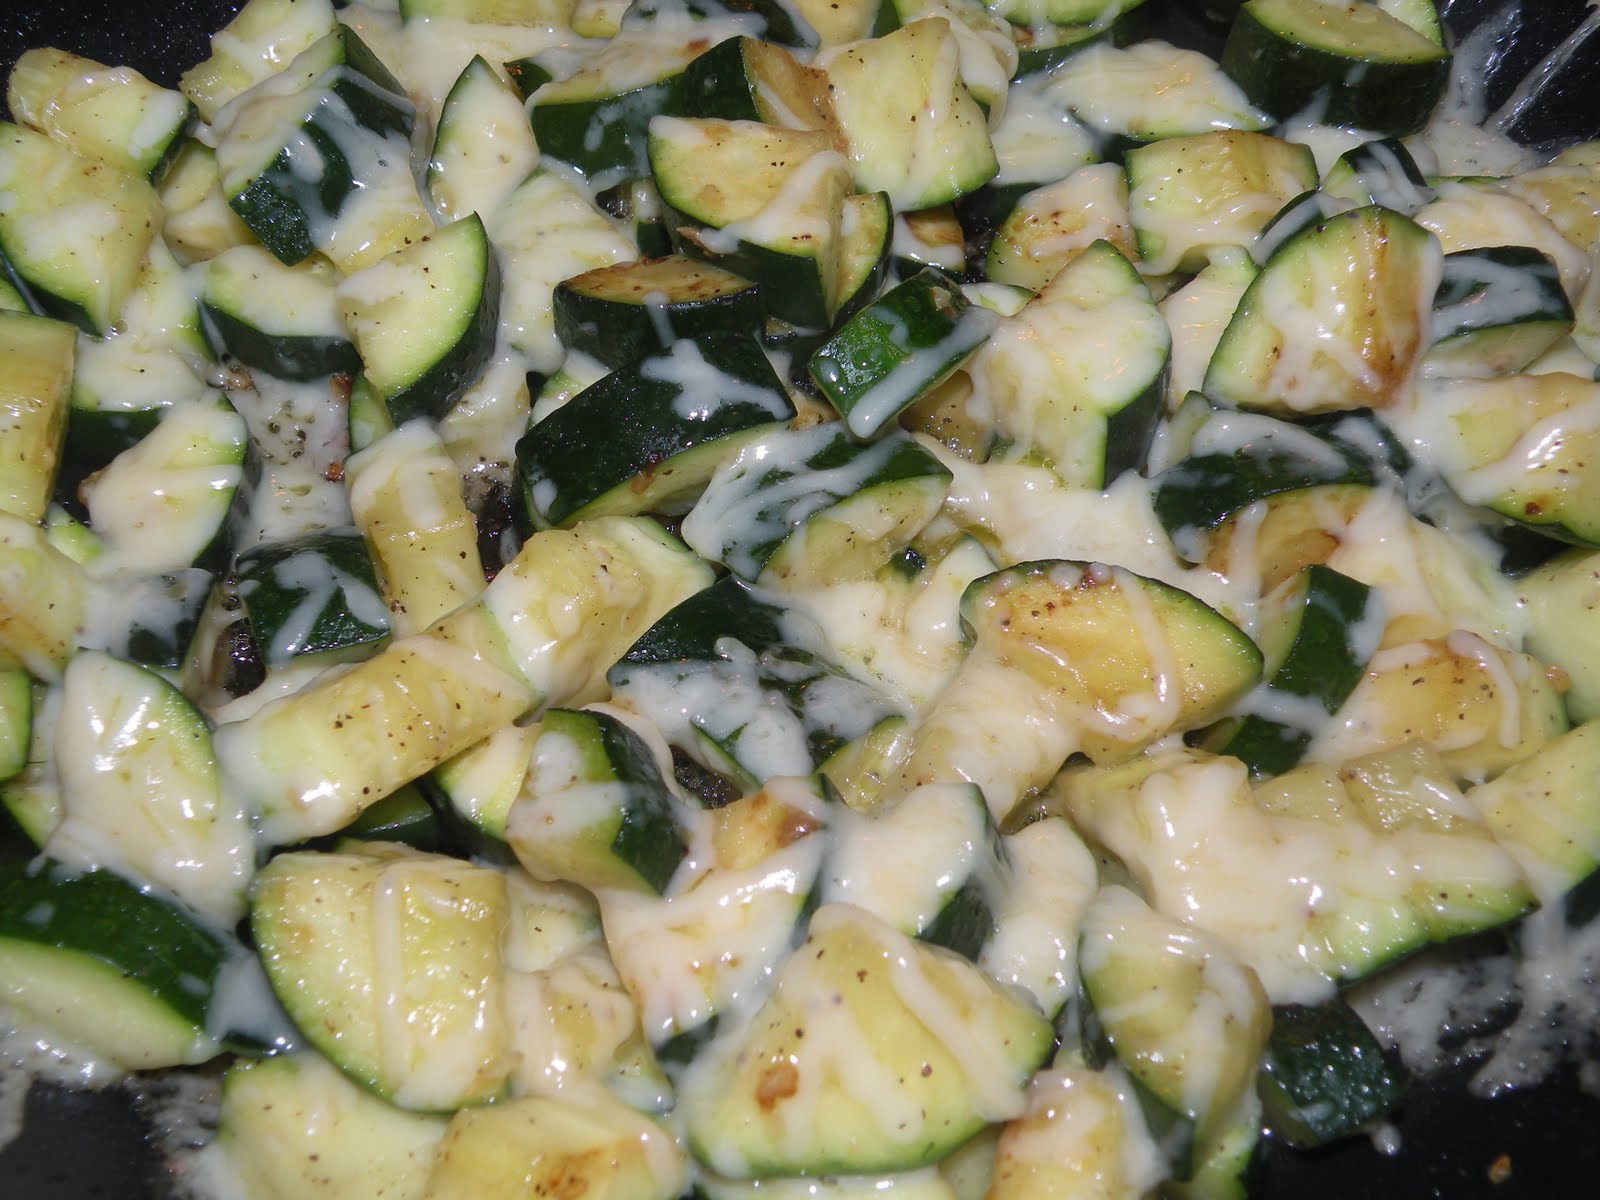
Simple Summer Squash-as-a-Side

Speaking of squash... I know my last post was on Squash & Fresh Basil Pasta, and my next post will be on Zucchini Frittata, so this post I wanted to share a simple side dish that's one of my favorite "go-to's" during the week, especially in the summer months when squash is SO plentiful! Here is an updated version of "Summer Squash as a Side".... then after that, I promise my next dish will not have any squash!!!

Ingredients:
3-4 small summer squash
1-2 cloves garlic, minced
Sea Salt
Pepper
Expeller Pressed Coconut Oil

Added Options, per your preference if you want them:
1 TBSP butter
1/4 cup red onion, finely chopped
a handful of shredded Parmesan Cheese

Instructions:
Chop 1/4 of a red onion, and put it in a frying pan with a drizzle of oil (and your TBSP of butter if desired). Saute the onion for about 2-3 minutes until tender or browned. While that is going on, wash your squash, cut off the ends, slice the squash down the middle and then cut it into 1/2 pieces. Once your onion is tender, add your clove of garlic and put the squash in the pan and let brown for 5 minutes, stirring occasionally so not to burn. In the last minute or two, throw a handful of shredded parmesan cheese on top and cover it with a lid to help it melt- or leave it plain- and serve as a side dish! It's delish!!!

Options to serve it with...
Serve this dish with chicken or beef, it's a quickie, so it comes in handy in a pinch! You can also grill strips of it on the BBQ if you already have that going and when you pull it off, you can throw some cheese on it to melt while it is still piping hot!

Monday, June 20, 2011

Squash & Fresh Basil Pasta

Sometimes I make concoctions and they are just that... concoctions that fill our belly for the evening and are never repeated again. But sometimes I make concoctions are so good that they get jotted down and find their way on here to become favorites, once-in-a-while treats, or weekly dishes. This was one of those lucky dishes that got jotted down because it was so tasty & fresh. It will definitely be making it's way back to our table this summer, especially if our garden produces us a good harvest of summer squash!

So, I was so tempted to keep adding to this recipe, I wanted to add white wine and I contemplated adding a "dressing", but it was so light and simple the way it was, I just left it alone. It's a simple, light, low-maintence pasta that could be whipped up with a few ingredients, ones that you could easily have on hand like I did tonight. I was too tired to go to the store, so I found a bag of pasta, defrosted a package of chicken, and joyfully took out the bunch of basil and yummy squash that we got in our CSA box this morning. And here's what we came up with:

Ingredients:
1 lb. brown rice penne pasta
2 chicken breasts, cubed
3-4 large squash
1 cup chopped sweet onion
1 cup parmesan cheese
1/2 cup fresh chopped basil
3 cloves garlic
1/2 lemon, juiced
*** optional: a large handful of cherry tomatoes, sliced in half
Grape Seed Oil
s & p
** If you have any cherry tomatoes on hand that need to be eaten, you could toss those in too- that was a yummy addition the following day!

Directions:
Boil your water and cook your penne pasta per directions on the bag. Drain and set aside in a large bowl. Chop a sweet onion and add it to a hot pan that has a drizzle of grape seed oil in it and saute the onion for a few minutes, adding 2 cloves of garlic. After sauteing your onion for 2- 3 minutes, add your cubed chicken and cook it until it's brown (you may need to add another splash of oil once your chicken is in the pan). Season your chicken with s & p. When your chicken is nicely browned, add it to the large bowl with the cooked pasta. Next, add another drizzle of oil to the same pan and add your chopped squash (I used one large yellow crooked-neck squash, one huge green zucchini, and one big yellow patty pan squash). Add another clove of garlic and some s & p to your squash while it cooks. Cook that for 3 minutes or so then add the squash along with it's juices left in the pan to your bowl of pasta along with your parmesan cheese (mine was a heaping 1 cup) and your 1/2 cup fresh, chopped basil. Then squeeze your half of a lemon right over the top, toss, check the seasoning (s & p), and serve!

** This will make a lot of pasta, perfect for left overs or large groups! Add a little more oil or lemon juice when re-serving if it seems too dry.
FYI: here's a picture of "Patty Pan Squash" ... I didn't know it's official name.... I always refer to it as UFO Squash... but I guess it has a real name it would like to be known as!

Thursday, June 16, 2011

"Fruity Water"


So I live in a "dessert climate" and well, summer is officially here. It's hot. And we are feelin' it! So in effort to encourage myself AND remind myself to drink more water during the day, I set out a pitcher of water on the counter or in the fridge and add different "fruity flavors" to it daily to keep my water consumption fun, exciting, and well, consistant! My daughter then spottedthe pitcher and replied "Mom, I want some of that fruity water" hence fruity water was born and is now a staple in my house most days of the week... funny how everyone (including my husband) drinks more water when it's got a splash of flavor in it!

Different Ideas to slice up:
  • Strawberry, lemon mint (pictured above)
  • Orange, lemon, lime apple (pictured below)
  • Strawberry, blackberry, mint
  • Grapefruit, Orange, Pineapple
  • Orange, Strawberry, lime
Of course the possibilities are endless, but those are the ones I have tried so far. I also do this when hosting a party, I add my slices of fruit to my water bowl for good looks and good flavor :)

Tuesday, June 14, 2011

Tzatziki


Umm, this IS SOOOOOOOO good! For starters, let me say, I have a wonderful sister-in-law who is Persian.... she just so happens to be a great cook. So is her mom. And she has taken us to a few dynamite Persian restaurant's over the years, where without fail, they serve Tzatzkik. So, I have had scrumptious dish many times, thanks to her introducing it to me- and I finally got around to making a batch of it on my own when a big bunch of fresh dill showed up in my CSA box. This is a great recipe to make if you are going to a picnic or asked to bring an appetizer or finger food to a gathering... it will be LOVED by all, so make sure you make enough! I made it and snacked on it for lunch then served it as a side for dinner, and my whole family devoured it... it was that tasty--- and did I mention it's also fast, easy, error proof, minimal ingredients, so little prep---- I could keep going, really I could!

Ingredients:
16 oz. plain Greek yogurt
1/2 English cucumber, diced small
1-2 cloves garlic, minced
2 TBSP fresh dill, chopped finely
1/8 tsp sea salt
1/8 tsp pepper
***pitas, flat bread, or pita chips to serve with it

Directions:
Scoop your yogurt into a large bowl to mix everything in. Then mince your garlic, chop your dill, cucumber, and s & p. Then taste it, does it need more garlic for your taste buds?? add another clove. More cucumber, chop up another chunk. Serve it with pita bread, flat bread, crackers, pita chips, or over rice with kabobs (Persian style!). Cover and let chill until serving.

Saturday, June 11, 2011

Pita Chips...


Here's a great use for left over pitas... or a quick idea for some easy chips to go along with hummus and dips. Simply take your pitas, slice them in half, peel the pocket into 2 pieces, brush on some olive oil or grape seed oil, then sprinkle your sea salt & garlic powder on them and cut them into triangles. Heat your oven to 350 and lay them on a cookie sheet, then bake for 10- 15 minutes depending on how crispy you like them (and how thick you pitas are). You can add different spices like cumin or dried herbs or even cinnamon & sugar for a sweet treat!
Allergies: this is a great way to tailor your snacks to your specific needs. If you have allergies or are avoiding certain ingredients, you can find pitas or tortillas to your specifications and then make these to meet all your food needs!

Stay tuned for another hummus recipe, as well as a recipe for a Persian dip, Tzatziki, to serve along side your homemade pita chips!

Thursday, June 9, 2011

Apricot Chicken

I found this dish on a fun site, Simply Recipes, and I followed it almost to a tee, making just a few of my own tweaks. It was a little bit of an adventurous dish for me, I didn't know if I (or my family!) would be a fan of fruity chicken... but to my surprise it was a real treat- a really different dish, really unique and exotic flavors. I will definitely keep this recipe on hand for apricot season, a fun way to incorporate fresh, seasonal fruit into dinner time!

Ingredients:
1.5 lbs. of fresh apricots (6-8 apricots depending on the size)
2 lbs. of chicken tenders or breasts
1 TBSP honey
2 TBSP apple cider vinegar
3 TBSP expeller pressed coconut oil
1 onion, chopped
2 cups chicken broth
1 TBSP fresh rosemary, chopped
3/4 tsp cinnamon
1/8 tsp curry
s & p

Directions:
First chop your apricots and set them in a bowl adding the honey and vinegar, stir well and let them sit while you brown your chicken.
Next, warm 2 TBSP oil in your skillet and add your chicken, seasoning it with s & p and cooking it until it's browned on both sides. Then remove your chicken to a separate dish and set aside.
Next, chop your onion and add another TBSP of oil to your pan, sauteing your onion until it's browned. Once your onion is browned, turn down your heat to medium and add your chicken broth, cinnamon, rosemary, and curry. Take 2/3 of your apricots and put them in the blender or food processor and blend them to a thick, chunky consistancy and add them to the simmering sauce and let them simmer for 10 minutes. Lastly, add your chicken and remaining apricots back and let simmer for another 5 minutes until it thickens up.


Note: I used apriums because I had them from my CSA box and they worked wonderfully, had a little bit more of a tangy flavor (because an aprium is a cross between an apricot and plum) so either would work well!

Wednesday, June 8, 2011

Harvest Grain Blend + Veggies

The other night I when I was getting dinner going I pulled out the leftover, unused veggies from the week and noticed I had an extra zuccini and 2 carrots, so I diced them up really small and tossed them into my Harvest Grains Blend (from Trader Joe's) to add a little more color, flavor and variation. It was a great way to incorporate veggies into our grains.

It's simple- Bring your broth to a boil and while that's boiling, chop your veggies, then add your grains, chopped veggies, and butter at the same time and cook for the 15 minutes on low. Both your grains and your veggies will be done at the same time- perfect combination! This is such a nice thing to keep on hand in your pantry and perfect for the last minute dinner addition because it takes such little prep and cooks so quickly! Enjoy!!

Monday, June 6, 2011

Peaches & Berries Oatmeal

Hello Breakfast. I am in love.
I eat oatmeal, not because I love it, but because it's simple and because I tend to overdose on eggs. But, I should re-phrase that to "I ate"- because that is a thing of the past. NOW I eat oatmeal, because I think it's simply divine when it's topped with fresh, ripe, juicy, sweet peaches and blueberries with a hint of cinnamon! It's like having fresh, warm cobbler for breakfast... what could be better??

Directions:
Make your oatmeal per directions on the box, but add cinnamon while it cooks, give a generous sprinkle and stir. When done, dump on 1 cup fresh, seasonal ripe fruit and enjoy! No maple syrup or brown sugar is needed- the fruit adds all the sweetness! SOOOOOOO good! I can't wait 'til morning!

Saturday, June 4, 2011

"Peachy Keen" Smoothie


There are 2 kinds of smoothie makers out there. Ones that follow a recipe, and ones that dump anything in and end up with a different smoothie each time. I am the later. But, I wanted to post some recipes (or ideas if you are a "dumper" too) to help you change up your flavors and make you feel a little more like "Jamba" in your kitchen!

This DELICIOUS smoothie will leave you feeling "Peachy Keen", it is so sweet, creamy and flavorful you will gobble it up in minutes.... as will your kids! There are only a few ingredients, and as always, it tastes the best when the fruit is fresh and ripe.... which is even more reason to be making them---- STONE FRUIT SEASON IS FINALLY HERE!!! YAHOO!

Ingredients:
2 ripe peaches or 3 ripe nectarines
1/2 cup fresh mango, peeled
1 cup ice
1/4 cup coconut milk
1/4 cup coconut water (add another 1/4 cup if you like it runnier)
2 large handfuls of spinach
2 TBSP flax seed

** If you don't have coconut water you can substitute if for regular water and/or a splash of orange juice!

From "Peachy Keen"
to "Peachy Green!"
Directions:
Dump in your Vitamix or blender and blend until smooth!

NOTE: This is not only a good way to get your kiddos "greens" but you can also add supplements to them without them even noticing! I add Osteo-Sun to them which is a calcium and Vitamin D supplement- I highly recommend it for you and them!

P.S. I know my picture is of a kids up, but trust me, this was one of MY favorite smoothies of all times.... it's not just for KIDS!