Monday, October 25, 2010

Dirt Balls...

Entry #2 of Scrumptious Desserts:
So my crazy mom made these a LONG time ago, she loves to try new recipes too, I wonder where I get it! They are really easy to make, easy to serve when company comes over or for a party because you can make them ahead of time. They are perfect too for that custom taste of yours- you can add whatever toppings suit your fancy and they will be great every time! By the way, have you every tasted the French Vanilla Ice Cream from Trader Joe's... it's one of the best vanillas I have ever tasted- really creamy and really flavorful!

Ingredients
french vanilla ice cream
chocolate wafers or Oreo cookies (with the centers scraped out)
toppings (carmel, butterscotch, hot fudge, whip cream, or fresh fruit... or all of the above!)

Directions:
First (and ALWAYS!) you are going to WASH YOUR HANDS because you have to handle the ice cream to make them into balls! You are going to chop or smash your chocolate cookies into crumbs, I put mine in a Ziplock Freezer bag and smash them with a rolling pin. Once they are finely smashed, pour them onto a plate. Then you are going to scoop your ice cream and create a ball to the size that you would like, shaping it with your hands- warning this part is cold- and stick it in an air tight container to "refreeze" because they will melt a bit while you are trying to form them. After about 20 minutes in the freezer, take them out and roll them around on the cookie crumb plate- you can put them back in the freezer until you are ready to serve them or use them immediately. When it comes time to serve them, set it on a plate with drizzled hot fudge & berries, or add a dollop of carmel or whip cream- or put it in a cupcake liner and let your guests chose their toppings. You can't go wrong!

200th POST- thanks to those of you who have left comments, I will be picking a name at 10pm on Thursday, October 28th and the winner will be announced on the 29th! Thanks for joining the fun!!! Don't forget to leave your comment if you haven't already!

Sunday, October 24, 2010

Homemade Rocky Road Ice Cream

So, thanks to Lisa, who left a request for some frozen treats on this blog- we are going to dedicate to her an ENTIRE week of SCRUMPTIOUS homemade treats to enjoy! Some of them are going to defy the rules of "healthy" but they won't lack in flavor or fun... stay tuned all week to find something that you might like to" treat" yourself with!


Entry #1 of Scrumptious Desserts:
Wow, so this is de-licious, and doesn't exactly qualify with the "healthy" motto of this blog calories-wise, but I always prefer to make something homemade... so think of it that way- you are getting just what YOU put into it and nothing extra (that's usually in fine print) that some ice creams add! This ice cream is so yummy AND creamy AND chocolatey good, I couldn't resist including it in this weeks "Scrumptious Desserts" for all to enjoy!

Ingredients:
1 can sweetened condensed milk (14 oz.)
1/2 cup unsweetened coco powder
2 cups heavy cream
1 cup whole milk
1/2 tsp. cinnamon
1/4 tsp. salt
1 TBSP vanilla extract

Directions:
In a sauce pan heat your milk and coco powder until it is smooth and slightly thickened (about 5 minutes). Then remove it from the heat and let it cool. Add your cream, milk, vanilla and spices (including vanilla). Stir and refrigerate until cold. Then pour in your mixture into your FROZEN ice cream canister. Last add your nuts and marshmallows and freeze until hardened.

Recipe from: the kitchen of Debbie Zaballos, my mama

And a birthday shout out to my sister-in-law Lisa, thanks for the FUN request- We hope you had a great birthday, we love you and are thankful for you... and your love for desserts! :)

Wednesday, October 20, 2010

200th Post, Elderberries & a Give Away....

(Fresh Elder Berries)

WOW, can't believe I made it to 200! Thanks for checking in every once in a while, hopefully you have found some recipes to try or tips to use in your own cooking adventures!

I wanted to do a "different-than-normal" post (beings that it is the 200th one I've done!!!) and I couldn't think of a more perfect one than the newest Elderberry Concoction that I have just tried, it could be my MOST FAVORITE HOME REMEDY YET! I have been hearing a lot about Elderberries everywhere I turn. It seems they are really making a name for themselves- whether it be with Dr. Oz & Oprah (via my mom, I don't have cable!), the health articles and websites I check out, or one of my all time favorite blogs Passionate Homemaking where I found this recipe and tutorial video on how to make your own Elderberry Syrup for PREVENTING sickness and HEALING soar throats and cold like symptoms- perfect timing for the winter months ahead, right?

I am a big fan of trying things out that prevent sickness (especially with little kids in my house all the time- even more so when I taught 6 year olds all day long- and now MOST importantly because I am about to have a newborn in the house during cold & flu season!) so I jumped on the opportunity and thought it was worth giving it a shot..... AND I AM SO GLAD I DID!

Most of the ingredients are ones you have on hand or things you can find at your local grocery store, with the exception of the Dried Elder Berries. I purchased these online and they shipped rather quickly from Mountain Rose Herb Company. I bought an 8 oz. bag in hopes that it would last me a few rounds (note: if you use that site, you have to make a minimum $10 purchase).

It's so simple to make, watch this video posted on Passionate Homemaking or follow the instructions below. If you don't want to make your own, you can purchase it as well, but it's much more cost effective to give it a whirl yourself!


In a small sauce pan bring to boil the following ingredients:
1/2 cup dried elder berries
2 cups water
5 cloves
1 cinnamon stick
1 TBSP freshly grated ginger
***(you will also need 1 cup local or wild honey later in the recipe)


Once that comes to a boil, turn it down and allow it to simmer with the lid on for 20 minutes until the liquid reduces by half. Remove it from the heat and pour all the ingredients through a strainer and into a bowl. Gently press the Elder Berries to remove all the juices from them. Then add 1 cup honey to your elder berry juice that you have just poured into a bowl. (NOTE: I have made this recipe many times since posting it and have cut the honey in HALF so that it's not as sweet, it still packs the same punch though!) Stir it well, let it cool on your counter top, then transfer it to a jar with a sealing lid and store it in your fridge for 3-4 weeks. This syrup is safe for both adults and children alike. (NOTE: Remember there is HONEY in the recipe so it isn't recommended for children under 2. Just make sure everyone else in the household is taking it to lessen the chances of sickness spreading!)
Directions on how to take it:
You can take this Elder Berry Syrup as a preventative & to boost your immune system by taking 1 tsp. daily. Or you can also take it if you feel sickness coming on or have already gotten sick (flu, soar throats, colds, aches and pains, or anything viral) up to 1 TBSP per hour.

Hope this post will help you throughout the cold season, I am so glad I found this concoction right in time! Let me know if your feedback!

200th POST & a Trader Joe's Gift Card Give Away:
Now because it's the 200th post, leave a comment sharing a favorite recipe from this site or a request for a certain kind of recipe you'd like to see in the future and win a $10 Trader Joe Gift Card... because Trader Joe's is my favorite store and my home away from home :) Just a little something fun! Give away will end in ONE WEEK on October 27th and the winner will be posted on the 28th- so stay TUNED!

Monday, October 4, 2010

Sauteed Spaghetti Squash....

So, the other day, my girl Monica posted on FB how excited she was the Spaghetti Squash was back in the season, and she also let me in on her favorite way to cook it.... her recipe is on my meal plan this week, so I look forward to posting it soon- but for now, here is a simple and easy way to cook it as a side dish (or add left over chicken to it and serve it as dinner). Do you have a favorite way to cook it or a stellar recipe you use??? Share it with us!!! Stay tuned for Monica's Spaghetti Squash tips...

Ingredients:
1 spaghetti squash
1/2 red onion, finely chopped
2 cloves garlic, minced
Grape seed oil
s & p
1 TBSP parsley, chopped
*** (optional) handful of parmesan cheese
*** (optional) chopped (cooked) chicken

Directions:
Cut your spaghetti squash in half length-wise (as in picture above) and scoop out the center seeds. Then turn FACE DOWN on a foil lined roasting pan or cookie sheet. Bake for 40 minutes on 350 until it's tender, but still crunchy . Let them cool for about 5 minutes until you can handle them. In a large skillet, heat some Grape Seed Oil, your red onion and garlic and saute for a few minutes. Then , using a fork, scrape out the insides of the spaghetti squash- which will look like SPAGHETTI!!! Add it to your pan and let it cook for another 5 minutes, turning frequently. Add your parsley, s & p, and chicken and cook for a bit longer. Top with shredded parmesan, let it melt in and then serve!

Sunday, September 19, 2010

Roasted Eggplant Soup

Branching out. That's what I am doing.... thanks to my Abundant Harvest Organics Veggies that I get weekly. Because I receive certain things in my box, I am encouraged (or forced if I don't want to be wasteful which is one of my main goals when it comes to my kitchen!) to try new things, things I wouldn't necessarily come up with on my own. So this week, I not only got tomatoes, onions, and eggplant in my box- I also got a recipe for a Roasted Eggplant Soup that I had never tried... and I tried it.... and I liked it.... and I would make it again! So I am passing on the recipe to you, give it a chance, put a little pep in your step and branch out too- you never know what you will come across!

I personally think this soup would be perfect for a dinner party as the appetizer, or a luncheon served along with a light salad. We had it tonight for dinner with a hardier salad and I thought it was perfect, it reminded me of something you would order at a quaint little restaurant! I omitted the crumbled cheese, for preference sake, but it was delicious just the same.

Ingredients:
1 large egg plant or 2 medium ones, halved
3 tomatoes, halved
1 onion, halved
4 large cloves of garlic, peeled
Grape seed oil or Olive Oil
Salt & pepper
1 tsp dried thyme
4 cups chicken broth
1 cup heavy cream
** 3 ounces crumbled cheese of your choice** optional

All your veggies ready to roast, lightly brushed with Grape Seed Oil and sprinkled with S & P.
After Roasting for 40 minutes...
Directions:
Wow, this soup is easy on the prep, it takes awhile as far as actual cooking time, but honestly, it's very little hassle. You are going to wash and half your veggies and peel your garlic, placing them on a foil-lined roasting pan or cookie sheet and pop them in the oven at 400 for 40 minutes until they are lightly browned. Then scoop them up and into a pot they go with the chicken broth and thyme. Bring that to a boil and then let it simmer for another 35 minutes. From there, take and dump it in your Vitamix or Food Processor and puree it, add it back to your pot, add your heavy cream and bring it to a simmer again. Serve it up in soup bowls or mugs and add your crumbled cheese it you'd like!

Wednesday, September 15, 2010

Homemade Croutons


When I think of croutons, I think of my childhood... I was the kid that liked to sneak a handful of croutons from the salad bar when no one was looking! I loved them as a little snack.... regardless or not if they were on top of a salad! But in my adult years, I haven't really seen much of them, I guess I kinda forgot about them... I have just gotten used to adding nuts and seeds to my salads and have neglected the long lost little croutons- that is until now. You have to admit they are a fun little treat... and way better homemade than store bought! Honestly, if you have never had fresh, homemade ones- you MUST try this recipe... you'll thank me later!

I had some left over Ciabatta bread on my countertop the other day and I was thinking of a way it could go to use and not be wasted... at the same time I was desiring a little change to my daily dinner salads that I make- and WHA-LA! Just like that, I found myself making a batch of homemade, crunchy, seasoned, crispy, way-better-than-any-boxed-crouton-you-have-EVER-tried kinda a crouton for dinner. Here's all you need to make your own...

Ingredients:
Day old Bread, at least 1/2 a loaf
Grape Seed Oil (or Olive Oil)
sea salt
garlic powder
dried herbs (basil, thyme, oregano, or parsley)

(I seasoned this batch with salt, garlic powder, oregano & thyme)
Make sure they aren't stacked on top of each other for even baking!
Directions:
SO simple. Cut your bread into cubes, I prefer my croutons a little on the smaller side, (1" x 1") but if you want bigger ones, no one is stopping you! Throw them all in a bowl, drizzle your oil on them (I used Grape Seed Oil but you can use Olive Oil if that's what you cook with). Then season them to your liking with your preferred flavors, toss them well and then spread them in a single layer on a roasting pan or cookie sheet lined with foil. Bake on 350 for 20 - 30 minutes. If you prefer yours softer, go 20, if you like them brown and crunchy and toasted (like me!) you will be closer to 30! Let cool for a few minutes and enjoy! They will store up to 2 weeks in an air-tight container or ziplock bags!

Sunday, August 29, 2010

Homemade & Fresh Peach Crisp

Can I just start by saying this is SOOOOO simple... honestly- it takes no time at all to whip up this scrumptious dessert! I look forward to making some all winter long now that I have fresh frozen peaches waiting for me in my freezer! For those of you not familiar with cobblers, it's kinda like a pile of fruit with some yummy crunchy stuff on top- no crust underneath.

Ingredients:
6-7 juicy, fresh peaches (pitted, peeled, and sliced)
2 cups oats
3 TBSP whole wheat flour
1/2 cup brown sugar
1/2 cup melted butter
1 tsp cinnamon
1/2 tsp nutmeg
1/4 cup pecans or walnuts, finely chopped

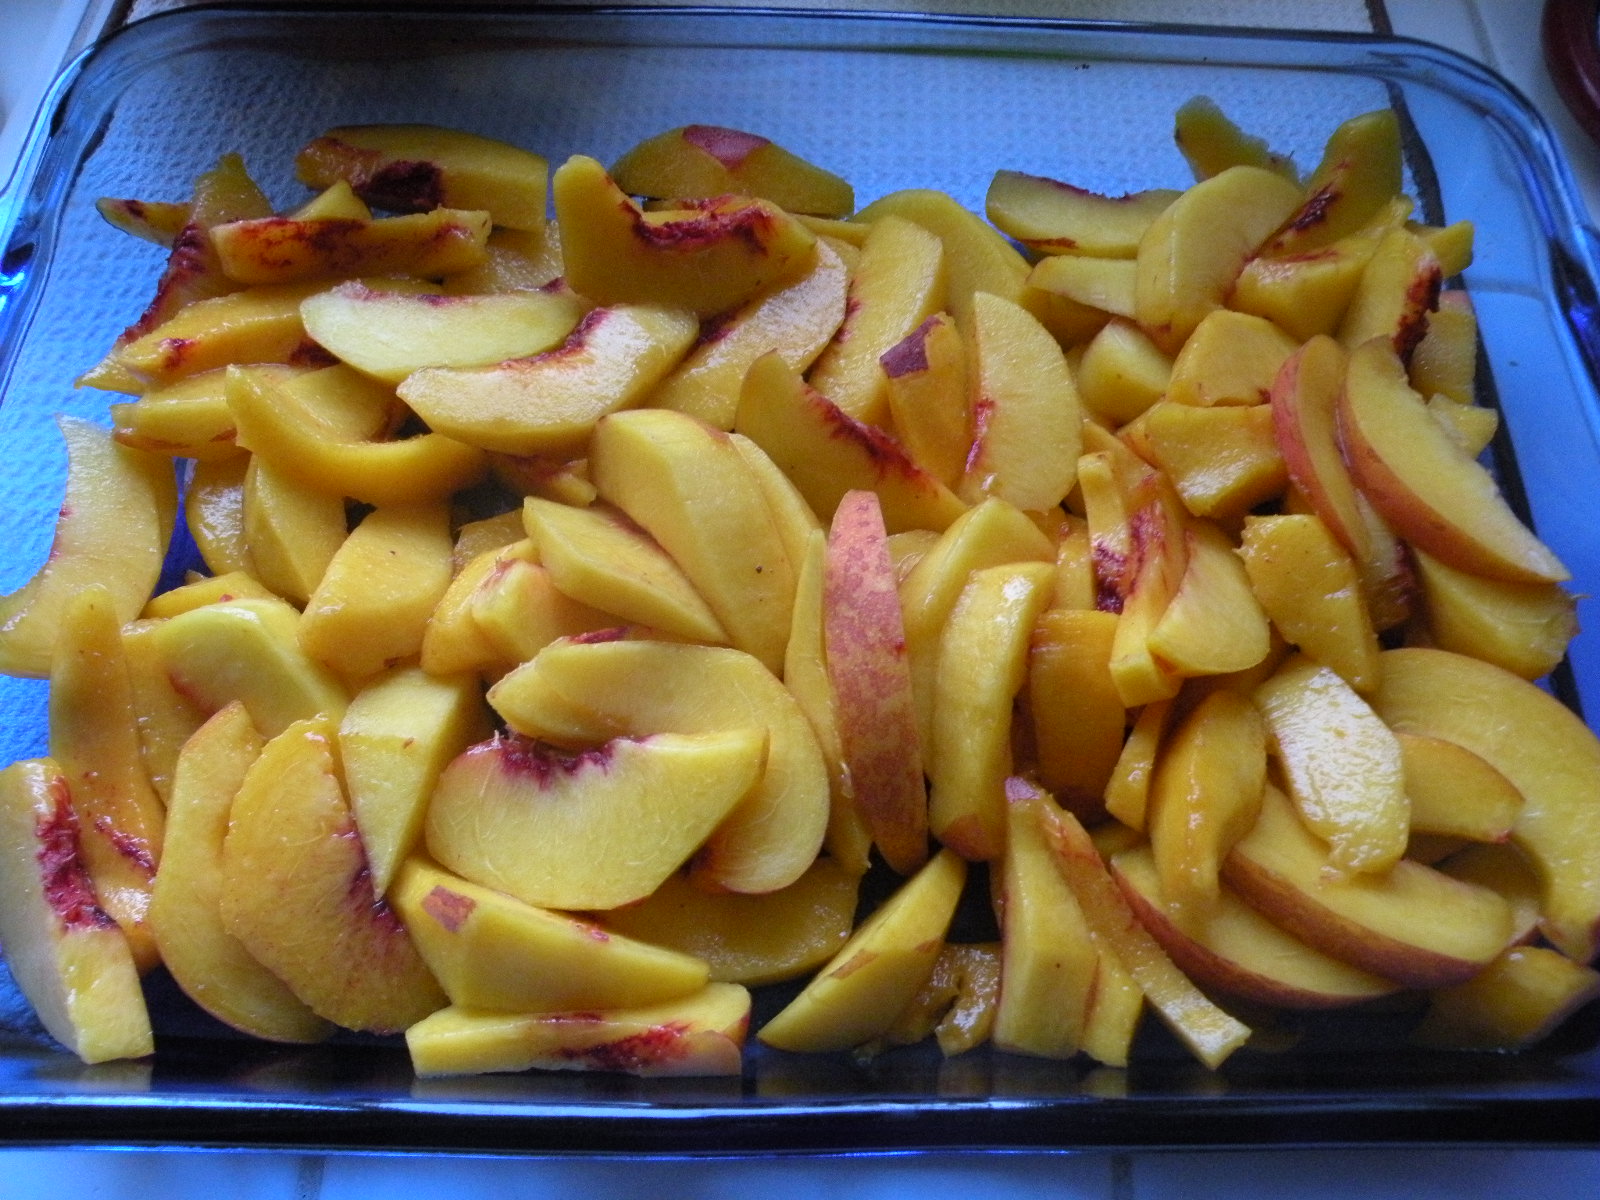
Step 1: Fresh peaches- peeled, pitted, and sliced right into the dish!
Step 2: Mix up the topping. That's it.
Directions:
Simple. Wash, peel, pit and slice your peaches right into your 9 x 13 pyrex dish. Then mix up the remaining ingredients in a bowl, pouring your melted butter in last and mixing it until it's a crumbly topping. Scoop your crumbly topping out of the bowl and onto the top of the peaches, pop it in the oven on 375 for 30 minutes and cook until it's got a nice golden crisp color on top. It is best served warm with vanilla ice cream- but I am not gonna lie- it's delicious the next day chilled as a leftover delight!

Please excuse my old rickety pyrex dish, my cute one was in use!

Saturday, August 28, 2010

End of Summer Fruit...

So my goal for the end of this summer was to pick up some local, fresh, ripe boxes of stone fruits to freeze for the coming months, as well as dehydrate them and make some fruit roll ups.... AND I DID IT! Here's some tips I learned along the way...
The thicker you layer your fruit roll ups (for use in your dehydrator) the chewier they are. They take longer to dehydrate, but they turn out really well. If you can make 3 rows/rolls at a time it makes a ton, plenty to store up for the fall and winter months.
I tried to dehydrate some peach slices, they turned out a little drier than I would have liked. Next time I think I will cut them in quarters or even halves like they sell them at Trader Joe's so that they are chewier.
This was probably the best part of my adventures.... I sliced TONS of peaches and froze them on a cookie sheet or cake pan and put them in the freezer for about 2 hours. I actually used a cake pan so that I could layer the peaches, and in between each layer I put a piece of wax paper. Once they were frozen enough, I put them in a plastic freezer bag and continued to add each batch to it. The benefit to freezing them first BEFORE putting them straight into the bag, is they don't freeze into one big clump- they freeze in individual slices.
I look forward to using these frozen peaches in smoothies, peach cobblers and de-thawed treats for the middle of winter! Stay tuned for my peach cobbler recipe, it was so simple and SOOOOO good!

Friday, August 27, 2010

End of the Summer Tomatoes..

So I had a bunch of tomatoes to use up at the end of this summer before I pulled out my tomato plants and I was in a quandary with what to do with them. So, I looked up on line how to make your own, homemade tomato sauce from scratch and it was surprisingly easy. Here's what I came up with in case you find yourself with tomatoes you don't want to waste.

First, cut a slit down one side of your tomato....
...and then put them in a pot of boiling water for just a minute or two in order to remove the skins.
After they have been in a boiling bath for 1-2 minutes, strain them and rinse them under cold water for another minute. Then peel the skin off of them, it comes right off really easily and put them right into your food processor.
Once they are blended you are going to add them to a stock pot that has some celery, onion, garlic, and a drizzle of Grape Seed Oil (the amount you use with all of the ingredients depends on how many tomatoes you are working with).
Let them simmer on low for about 2 hours. You can add this as your base to any soups (like Minestrone Soup or the like), spaghetti sauce, or any other red sauce. I added red wine and seasonings (like Oregano & thyme, s & p) to mine and used it as a light spaghetti sauce with some ground meat and noodles- so simple and fresh!
The tomatoes cook way down, so the more you use the better. If you find your sauce getting to thick add a bit of water (or wine!) to get it to the consistency you like.You can freeze this or use it right on the spot- you won't be disappointed!

Thursday, August 26, 2010

Onion Chicken in Balsamic Sauce

This is not a new recipe, in fact- it is an old faithful one that I had previously posted, but with poor pictures- it didn't do it justice. If you have't tried this yet- you are missing out BIG time- get on it, add it to this weeks meal plan- it's SOOOO good!
Ingredients:
1 TBSP olive oil
1 sweet onion, chopped
4 chicken breasts
2 cloves garlic, minced
1 1/2 cup chicken broth
1/2 cup balsamic vinegar
1/2 cup sun dried tomatoes
S & P to taste

Directions:
Preheat the oven to 350. In a large skillet over the stove, heat your oil and add your chopped onion and garlic and saute over med.-high heat for a few minutes until the onions are tender. Put washed chicken breasts in skillet and brown for a few minutes on each side. (NOTE: I cut my chicken breasts into about 6 big chunks, so that they soak up more of the goodness.) After it is browned on the stove, place the chicken & onions in a 9x13 baking dish. Heat the balsamic and chicken broth in the same skillet until it boils, let is simmer for a few, it will thicken some. Pour this mixture in your baking dish over your chicken, cut up your sun dried tomatoes and put them in (if they are whole, I cut then in half or thirds with kitchen scissors), then cover it with foil and pop it in the oven for 20- 30 minutes.
Serve with: it is almost a MUST to serve this dish with some sort of pasta/rice because it has so much wonderful juice, it really is great over a bed of pasta. I use the whole wheat or brown rice pasta from Trader Joe's and I make a green to go along side. ** This dish has been known to be a big hit with company- great to make for guests!

Monday, August 9, 2010

Dehydrators: 201

Homemade Fruit Roll-ups
These are super easy to make, you just need ripe fruit and a blender.... and your dehydrator of course! They are so great if you have left over fruit that you're not going to get to in time or some that is too soft for eating, but perfect for fruit-rolling! Simply spray your fruit roll-up tray (that comes with your dehydrator) with a non-stick spray and blend your fruit until it's completely pureed. Pour the pureed mixture on the fruit roll-up trays and smooth it out until it's even all over the tray. Put in the dehydrator- see manual for time amount (mine was about 6-7 hours depending on how thick you layer your tray).Here are some sample fruit concoctions:
  • 4 strawberries
  • 1 peach
  • handful of black berries
  • 1 plum
  • 1 cup unsweetened organic applesauce
Another one:
  • 2 cups strawberries
  • 2 cups applesauce
Another one:
  • 1 apple, cored not peeled
  • 1/4 cup water
  • 1 peach
  • 1 nectarine
  • 3 strawberries
** After it's done drying, they peel up really easily from the tray and I just tear mine into pieces and keep them in an air tight container... but they don't last long!

Sunday, August 8, 2010

Dehydrators:101

So, I had some crazy idea that I would start dehydrating fruit and herbs and whatever else I could think of, so I saved up my $$ and I bought one online for about $60. It's been fun to learn how to use it and try to get creative, but I haven't branched out too much, just stayed basic- here's what I've done so far:

Dried Apples.... A HUGE hit with my toddler!
I buy a big box of apples from Costco (when in season) or pick up a sack of them at a fruit stand or farmers market. Peel them, core them, and slice them. Place them on your tray and cook per dehydrators instructions. They are fabulous and the pectin in them really aid in digestion! If you or your little ones struggle with constipation, this is a great thing to keep on hand (as is FRESH apple & spinach juice made in a Juicer- I've made & recommended that many a times for family or friends after they have surgery, or are on antibiotics or have just had a baby- it's a great way to get things "going again!" Want more tips on the topic- email me I have lots of them up my sleeve!).
I also tried Kiwi & bananas- which were also a big hit! Sometimes I get a ton of one fruit (in this instance, kiwis) in my Abundant Harvest Organic Box for the week and we don't get to them all before they over-ripen, so we turn them into fruit snacks!
I also tried blueberries and grapes, but in my opinion they weren't worth the time or cost to make them, it's easier to buy your own raisins, you need to have TONS of grapes to even make a dent in this project! I have also done strawberries and they are awesome!! Highly recommend those, as well as herbs like Bay Leaves, Marjoram, Basil, and Parsley (when I have left over herbs that I am not going to use, I pop them in the dehydrator so they don't go to waste!)
So what I am learning is what thickness we like, how long to dehydrate them, and which ones we like soft and others we prefer crunchy. It's my goal to do a few big batches at the end of a season to save some yummy fruit for us when they are no longer in season... we'll see if I get it done with all of the stone fruits at the end of this summer season! If you ever want to try this and have fruit to use, please feel to borrow mine if you want to take it for a "taste spin" before purchasing your own!

Next Update: How to make Homemade Fruit Roll-ups

Thursday, August 5, 2010

End of the Week Pasta


My sister came up with this little recipe a long time ago- it's simple and easy, yet so tasty and light. We call it the "End-of-the-Week Pasta" because we usually make it at the end of the week with whatever leftover veggies we haven't used up. There is no "must have" veggies that must be included, I just use any thing that's going to go to waste... here are some ideas that I used in my dish, feel free to vary it up! For those of you who like specifics, this recipe might drive you a little batty- bare with me!

Ingredients:
1 bell pepper (I had 1/2 orange and 1/2 red)
3 squash (I had 3 small yellow ones)
1/4 red onion (again, it's what was left over)
a large handful of green beans, chopped
a handful of mushrooms, sliced
MUST HAVES:
2 TBSP butter
3 cloves garlic
sundried tomatoes (I used about 1/4 of an 8 oz jar), sliced
1 TBSP grapeseed oil
1 lb. chicken, browned and diced
approximately 1/2 cup of shredded parmesan cheese (again, it's.... what I had left!)
1/2 cup white wine (I used sherry because it was already open!)
s & p

Directions:
Boil water for your pasta (I use brown rice cork screw pasta from Trader Joe's). Then, in a large skillet, add your 3 cloves garlic, 2 TBSP butter and chopped onion and let it saute until it starts turning brown. Add all of your chopped veggies & your 1/2 cup white wine and let them saute for a 4-5 minutes, sprinkling them with a little s & p. Remove them from the heat and add them to you serving bowl, sprinkling your parmesan over top so they melt together. Then in your same large skillet, add your TBSP of oil and your washed chicken (I used whole tenders, if you use breasts, chop it up before hand for quicker cooking). Season your chicken with some s & p and let them brown on one side before flipping them over. Once you flip them over, add another splash of white wine (mine was a BIG splash!) and let them finish cooking. Remove them from the pan and let them cool for a quick minute before cutting them into bite size pieces. Add your sundried tomatoes to your serving bowl, then your diced chicken, maybe a little more parmesan and toss well. Serve as the entree... you will enjoy it's light and crispy flavor from all the veggies and the zest from the wine!

Wednesday, August 4, 2010

Banana (or Blueberry) Crumb Muffins....

So if you haven't noticed yet from my previous posts, I LOVE to bake! Maybe because it seems more fun to share baked goods, everyone enjoys a little plate of homemade, warm baked goodies and I love to deliver them :) Here's one that never left my house, but instead was eaten and enjoyed by many who have passed through in the past 2 days... they are DE-LICIOUS and I would recommend them for any occasion or ordinary day! You can make them with bananas or blueberries...
My little chef in training... mashing bananas all by herself!
Ingredients
1.5 cup flour ( experiment with different flour types and measurements)
1.5 tsp baking powder
1 tsp baking soda
1/2 tsp salt
3/4 cup sugar or raw coconut crystals
3 ripe bananas, mashed
1 egg, lightly beaten
1/3 cup coconut oil
Crumb Topping

Crumb Topping
2 TBSP whole wheat flour
1 TBSP butter, soften or melted
1/4 cup sugar or raw coconut crystals
1/4 tsp cinnamon
Directions
Preheat your oven to 375. Mix your dry ingredients in a large bowl and sift well. Add to it your beaten egg, mashed bananas, a coconut oil (in liquid form), mix thoroughly and scoop into lined cupcake tins. Mix all your ingredients in a small bowl until it becomes crumbly in texture. You have two options for the topping,#1: spoon it on before they go in the oven and it will melt into the muffin OR #2 you can bake them for 10 minutes, pull them out and spoon it on top, immediately placing them back in the oven for another 10 minutes- this option will leave it more crumbly and loose like the ones in the pictures. You choose! ** Baking time is 18-20 minutes.**

Blueberry Variation:
Instead of using bananas, substitute the 3 mashed bananas for 1 cup fresh or frozen blueberries and 3/4 cup unsweetened apple sauce. They are equally delicious!** Just a note, when I made the blueberry ones, I put the crumbs on BEFORE they went in the oven, you can see the difference in the two pictures of how the toppings turn out.***